In the heart of every bustling kitchen lies a secret treasure often overlooked: veggie scraps. Those small bits of onion peels, carrot tops, celery leaves, and mushroom stems might seem destined for the compost bin, but what if they held the key to crafting rich, flavorful broth? Transforming these humble remnants into a vibrant pot of homemade stock not only reduces waste but also unlocks a world of taste and nutrition. Welcome to our kitchen guide on turning veggie scraps into flavorful broth – a simple, sustainable, and delicious way to elevate your cooking while honoring every ingredient’s journey.
Gathering and Storing Veggie Scraps for Maximum Freshness
Turn veggie scraps into flavorful broth by mastering the art of collecting and storing your vegetable remnants with care. Start by reserving peels, stems, leaves, and ends from a variety of vegetables-think carrot tops, onion skins, celery leaves, and even mushroom stalks. Rinse scraps gently to remove dirt but avoid washing away the natural flavor concentrates. Use a large, airtight container or a freezer-safe bag to store your scraps in the freezer, ensuring they remain fresh and packed with vibrant flavors. This slow-freeze technique seals in nutrients and keeps your scraps ready to release deep, aromatic notes into your broth.
Unlocking Rich Flavors with the Perfect Combination of Vegetables
Combining the right mix of vegetables is key to unlocking rich, savory depth in your broth. Balance sweetness, earthiness, and subtle bitterness by including carrots for natural sugar, celery for a slight bitterness that rounds out flavor, and onion for umami. For added complexity, throw in a few garlic cloves and herbs like thyme or parsley stems from your scraps. Avoid overly dominant veggies like broccoli or cabbage, which can overpower the subtle nuances. The secret is layering flavors so each sip of your broth offers a comforting, wholesome experience.
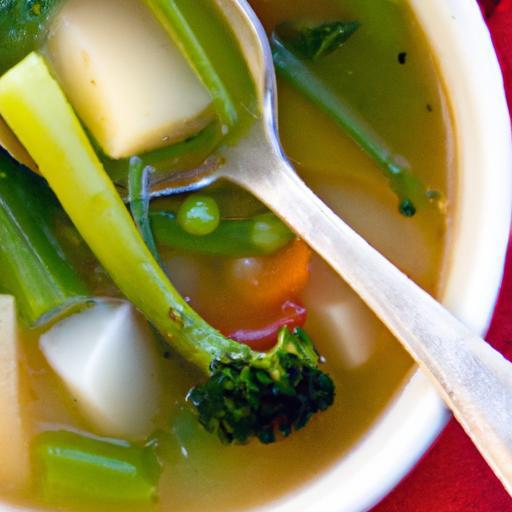
Step-by-Step Broth Brewing Techniques for Deep and Savory Taste
- Prepare your scraps: Collect about 6 cups of frozen veggie scraps. No need to thaw-just toss them straight into the pot.
- Sauté aromatics: In a large stockpot, heat 1 tablespoon of olive oil over medium heat. Add 1 chopped onion and 2 minced garlic cloves; sauté until golden brown, about 5 minutes, stirring occasionally to prevent sticking.
- Add scraps and water: Pour the frozen vegetable scraps into the pot along with 10 cups of cold filtered water. Bring to a gentle simmer over medium-high heat.
- Simmer and skim: Reduce heat to low and simmer for 45-60 minutes. Occasionally skim off any foam or impurities rising to the surface for a clear broth.
- Infuse flavor: Add 1 teaspoon of salt, a few parsley stems, and a pinch of black pepper halfway through simmering for that final flavor boost.
- Strain and cool: Using a fine mesh strainer or cheesecloth, strain the broth into a large bowl. Press gently on scraps to extract every last drop of flavor.
- Store properly: Transfer broth to airtight containers, leaving some space for expansion if freezing.
Creative Uses and Storage Tips to Extend Your Homemade Broth’s Lifespan
Home-crafted broth is incredibly versatile-use it in risottos, soups, or to cook grains for an added depth of flavor. To maintain freshness, refrigerate homemade broth up to 4 days or freeze for 3 months. Ice cube trays are perfect for storing small portions, which thaw quickly for sauces or single servings. If reheating, gently warm on the stove rather than microwaving to preserve nutrients and texture. Remember, a splash of lemon juice brightens soups or stews crafted with your veggie scrap broth, adding a fresh layer of complexity.
Prep and Cook Time
- Preparation: 10 minutes (plus storage of scraps)
- Cook Time: 60 minutes
Yield
- Approximately 8 cups (about 2 quarts) of flavorful vegetable broth
Difficulty Level
- Easy to Medium
Ingredients
- 6 cups frozen mixed vegetable scraps (carrot tops, onion skins, celery leaves, mushroom stalks, etc.)
- 1 medium yellow onion, chopped
- 2 garlic cloves, minced
- 1 tablespoon olive oil
- 10 cups filtered water
- 1 teaspoon salt
- 2-3 parsley stems
- Freshly ground black pepper, to taste
Instructions
- Gather your vegetable scraps in a freezer-safe bag; include peels, ends, and trimmings from a range of vegetables.
- Heat olive oil in a large pot over medium heat. Add chopped onion and garlic; sauté until soft and golden brown, about 5 minutes.
- Add frozen veggie scraps directly to the pot, followed by 10 cups of filtered water. Raise heat to bring to a gentle simmer.
- Lower heat to maintain a quiet simmer. Let cook uncovered for 45 to 60 minutes, skimming off foam to ensure a clear broth.
- Season with salt, pepper, and parsley stems halfway through cooking for layered, balanced flavor.
- Strain the broth through a fine-mesh sieve into a bowl, pressing on scraps gently to extract all flavors.
- Cool quickly in an ice bath or fridge and store in airtight containers for up to 4 days refrigerated or freeze for later use.
Chef’s Notes
- Substitute olive oil with avocado oil for a neutral flavor profile.
- For a richer broth, add a handful of dried mushrooms or a splash of soy sauce during simmering.
- Avoid vegetable scraps with bitter notes like zucchini skins or turnip tops-they can overpower the broth.
- Make broth in large batches and freeze in labeled containers for quick access to homemade flavor.
Serving Suggestions
This broth shines as a base for hearty vegetable soups, a flavorful cooking liquid for rice or quinoa, or as a warming sip alongside your meal. Garnish with chopped fresh parsley or a swirl of pesto to add a burst of color and herbal brightness to any dish.
| Nutrient | Per Cup |
|---|---|
| Calories | 15 |
| Protein | 1 g |
| Carbohydrates | 3 g |
| Fat | 0.5 g |
Explore more vegan soup recipes to pair with your homemade broth. For an in-depth guide on vegetable nutrition, visit The Nutrition Society.

Q&A
Q&A: Turn Veggie Scraps Into Flavorful Broth – A Kitchen Guide
Q1: Why should I save vegetable scraps instead of throwing them away?
A1: Vegetable scraps are little treasure troves of flavor and nutrients! Instead of tossing peels, stems, and ends into the trash, you can transform them into a rich, aromatic broth that enhances soups, stews, and sauces – reducing waste and boosting your kitchen’s sustainability.
Q2: Which veggie scraps work best for making broth?
A2: Almost any veggie scrap can work, but the best broth comes from a mix! Onion skins, carrot peels, celery leaves, mushroom stems, garlic cloves, and herb stalks add depth and complexity. Avoid bitter or overpowering ingredients like broccoli stems or cruciferous greens, which can impart a harsh taste.
Q3: How do I store scraps until I’m ready to make broth?
A3: Keep a dedicated container or zip-top bag in your freezer. Toss scraps in as you go, then freeze them until you’ve saved up about 4 cups’ worth. Freezing not only prevents spoilage but also helps release extra flavor when you cook the scraps into broth.
Q4: What’s the easiest way to make veggie broth from scraps?
A4: Simply simmer your veggie scraps in a pot of water for about 30 to 60 minutes. Add a pinch of salt and a few peppercorns for seasoning. Then strain the solids out and voilà-you’ve got a flavorful broth base ready to use immediately, or cool and freeze for later.
Q5: Can I use this broth as a substitute for store-bought broth?
A5: Absolutely! Homemade broth from scraps might be lighter and fresher in taste, but it’s just as versatile. Use it anywhere you’d use commercial vegetable stock-soups, risottos, gravies, or even to cook grains for extra flavor.
Q6: Any tips for boosting the broth’s flavor?
A6: Toast your scraps in a dry pan before simmering to deepen the flavor with caramelized notes. Adding a splash of soy sauce, nutritional yeast, or a bay leaf during simmering can also enhance umami richness. Lastly, don’t forget fresh herbs like thyme or parsley stems-they add brightness.
Q7: Are there any veggie scraps I should avoid using?
A7: Yes, steer clear of scraps with strong bitter flavors like kale ribs or too many cabbage pieces, as well as any moldy or slimy bits. Potato skins can make a cloudy broth, so use sparingly if at all. Always wash scraps thoroughly before use.
Q8: How can turning scraps into broth help reduce kitchen waste?
A8: By repurposing scraps you’d normally discard, you shrink your food waste footprint and get more culinary mileage out of every veggie. It’s a delicious, eco-friendly practice that saves money, reduces trash, and connects you more closely with the rhythms of your kitchen.
Ready to start simmering your scraps? Your next bowl of soup is about to get tastier-and greener!
Future Outlook
Transforming veggie scraps into a rich, flavorful broth is not just a clever way to reduce kitchen waste-it’s a delicious step toward a more sustainable and resourceful cooking routine. By embracing this simple practice, you unlock a world of taste from ingredients you might have discarded, turning everyday scraps into culinary gold. So, next time you peel, chop, or trim, remember: those humble veggie bits hold the secret to your next savory masterpiece. Happy broth-making, and may your kitchen always be filled with warmth, flavor, and mindful creativity!


