In the heart of every kitchen lies a treasure trove of homemade staples-jars of fragrant tomato sauce, tangy pickles, rich nut butters, and hearty jams-each crafted with love, care, and a dash of patience. Yet, the true magic isn’t just in creating these delicious essentials; it’s in preserving their fresh flavors and vibrant goodness for months, sometimes even years to come. Whether you’re a seasoned home cook or an adventurous foodie, mastering the art of long-term storage transforms your culinary efforts into enduring pantry delights. Join us as we unlock expert tips and creative strategies to keep your homemade staples tasting just as delightful as the day they were made, turning your kitchen into a treasure chest of flavor, ready whenever inspiration strikes.
Preserving your homemade staples takes not just skill but a true understanding of the science behind food preservation methods. Whether you’re saving freshly baked bread, tangy pickles, or robust tomato sauce, knowing how to select the ideal containers and create optimal storage conditions is your key to unlocking maximum freshness and extending shelf life. These practices not only maintain flavor and texture but also reduce waste and empower you to enjoy your culinary creations long after their made.
Prep and Cook Time
Preparation: 10 minutes | Cook/Processing Time: Variable depending on preservation method (e.g., blanching vegetables 3 minutes, pressure canning 30-60 minutes)
Yield
Varies based on quantity preserved, typically 4-6 standard-sized jars or containers
Difficulty Level
Medium – Requires attention to detail and safe handling, but accessible to all home cooks
Ingredients
- Fresh homemade staples: sauces, jams, pickles, breads, or cooked dishes ready for storage
- Preservation aids: lemon juice or vinegar (for acidity), salt, sugar, and optional natural preservatives like rosemary extract
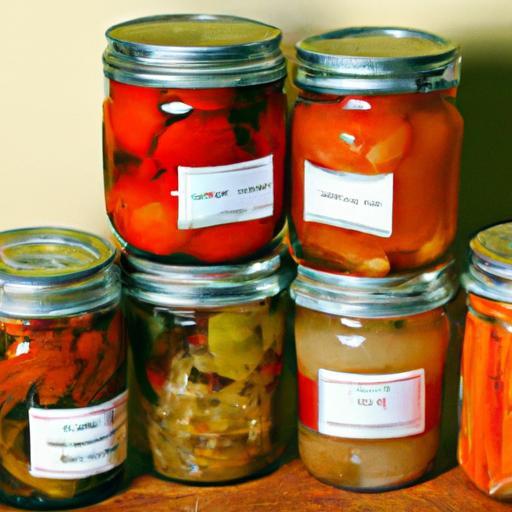
- Appropriate containers: glass jars with airtight lids, food-grade plastic containers, vacuum-sealed bags, or freezer-safe packaging
- Labels and markers: waterproof labels or masking tape and permanent marker
- Optional: oxygen absorbers for dry goods storage
Instructions
- Understand your preservation method: Whether freezing, canning, fermenting, or dehydrating, each method arrests spoilage differently. For example, canning uses high heat to destroy bacteria and seal oxygen out, while freezing slows enzymatic reactions that degrade food quality.
- Choose the ideal container: Glass jars are perfect for canning and pickling due to their impermeability and non-reactivity. For freezing, use thick plastic containers or vacuum-sealed bags to prevent freezer burn. Airtight containers with tight seals keep humidity and contaminants at bay.
- Prepare your staples correctly: Always cool hot foods before sealing, and avoid overfilling containers to prevent ruptures. For delicate items like berries or leafy greens, blanch before freezing to lock in color and nutrients.
- Practice optimal storage: Keep preserved staples in a cool, dark, and dry environment. Ideally, maintain temperatures between 50-70°F (10-21°C) for canned and dry goods. Freezer items should be at 0°F (-18°C) or below to preserve quality long-term.
- Label everything: Use waterproof labels to mark contents and preservation dates. Write in a consistent format like MM/YYYY to track freshness easily.
- Rotate your pantry regularly: Follow “first in, first out” principles. Consume older preserved items before newer ones to reduce waste and maintain flavor integrity.
Chef’s Notes: Tips for Success
- Container choice: Avoid metal containers for acidic foods as they may corrode and impart off-flavors. When using plastic, opt for BPA-free with the highest food-safe rating.
- Prevent moisture exposure: Silica gel packets or oxygen absorbers work wonders for dried herbs, grains, and nuts.
- Handling homemade sauces: Cool thoroughly before sealing. If freezing, use small portions to avoid repeated thawing.
- Fermentation caution: Use airlocks and periodically “burp” jars to release gases and avoid explosions.
- Visual check: Discard any jar with bulging lids, discoloration, or off odors – these signal spoilage.
Serving Suggestions
Present your preserved staples beautifully by pairing them with fresh ingredients. For instance, open a jar of homemade marinara and toss it with freshly cooked pasta, garnished with torn basil and a drizzle of olive oil. Serve pickled carrots alongside a charcuterie board for vibrant color and tang. Homemade jams shine atop warm toast with a pat of butter or melted brie. Using these storage techniques means you always have a delicious foundation ready to elevate any meal!

| Nutrient | Per Serving | Remarks |
|---|---|---|
| Calories | 75-150 | Varies by staple type |
| Protein | 1-3g | Preserved vegetables provide modest amounts |
| Carbohydrates | 10-30g | Fruits and sauces may have natural sugars |
| Fat | 0-5g | Minimal unless oil is included |
Expand your knowledge on preservation methods with our guide on homemade fermentation techniques, or gain insights into food safety at the USDA Food Safety and Inspection Service.
Q&A
Q&A: Preserving Your Homemade Staples – Long-Term Storage Tips
Q1: Why should I bother preserving my homemade staples for the long term?
A1: Think of your homemade staples as little jars of love and flavor. Preserving them properly doesn’t just extend their shelf life-it locks in freshness, nutrients, and the unique taste that store-bought options just can’t match. Plus, it saves you time and money, and keeps you ready for any culinary adventure or surprise gathering.
Q2: What are the best containers for storing homemade staples long term?
A2: Glass jars with airtight lids are your pantry’s best friends-they prevent moisture and air from sneaking in. Vacuum-sealed bags and BPA-free plastic containers also work well, especially for dry goods. The key is a tight seal to keep your goodies safe from spoilage and pesky pantry critters.
Q3: How does temperature affect long-term storage?
A3: Temperature is like the thermostat for your staples’ lifespan. Cool, dark, and dry conditions slow down spoilage and prevent mold. Avoid places with fluctuating temperatures or direct sunlight, like the top of the fridge or sunny windowsills. A stable environment is your staples’ happy place.
Q4: Can I freeze all homemade staples?
A4: Freezing is a fantastic preservation wizard for many homemade staples-soups, sauces, doughs, and even some veggies freeze beautifully. However, watch out for changes in texture; creamy sauces might separate, and some fresh herbs can become limp. Label everything clearly and leave some space for expansion!
Q5: Is it necessary to add preservatives to homemade staples for long-term storage?
A5: Not always! Many homemade staples can last long with proper sterilization, sealing, and storage. Natural preservatives like vinegar, salt, sugar, and lemon juice also play an important role. If you’re making jams or pickles, following tested recipes ensures safety without chemical additives.
Q6: How do I know when my homemade staples have gone bad?
A6: Trust your senses: if colors shift dramatically, textures become slimy or moldy, or if a sour or off-putting smell emerges, it’s time to say goodbye. When in doubt, throw it out-your health is priceless.
Q7: What’s a simple tip to keep my homemade staples organized and easy to find?
A7: Label, label, label! Write the contents and date on each container. Consider organizing by type-sauces on one shelf, jams on another. Using clear containers helps you spot what you need quickly and keeps your homemade treasures easily at hand.
Q8: Any tips for preserving bread or dough-based staples?
A8: Absolutely! For bread, freeze it tightly wrapped to keep sogginess at bay. For dough, portion and freeze individual balls to thaw as needed, maintaining freshness and flavor without daily baking pressure.
Preserving your homemade staples transforms your kitchen into a delicious treasure trove. With a little care and smart storage, your culinary creations can bring joy and flavor for months to come!
In Conclusion
As you embark on the journey of preserving your homemade staples, remember that patience and care are your greatest allies. With the right techniques and a little foresight, your jars of goodness can become time capsules of flavor, ready to enrich your meals long after the harvest season has passed. By mastering these long-term storage tips, you’re not just extending the life of your creations-you’re preserving a piece of your kitchen’s heart and the stories it holds. So, seal those jars, label them with love, and tuck them away wisely; your future self will thank you with every satisfying bite. Happy preserving!


