In the world of cooking, broth is the unsung hero-the flavorful foundation that elevates soups, stews, and sauces from ordinary to extraordinary. But what if you could unlock a treasure trove of rich, savory essence without spending a dime? Crafting your own broth from kitchen scraps, vegetable peelings, and even leftover bones isn’t just a savvy way to reduce waste; it’s a gateway to deep, complex flavors that store-bought broths often can’t match. This guide will reveal the secrets to transforming humble scraps into liquid gold, empowering you to create sumptuous broths that nourish both your palate and your pocket. Ready to awaken your inner flavor alchemist? Let’s dive in.
Choosing the Perfect Ingredients to Unlocking Flavor: How to Craft Rich Broth for Free
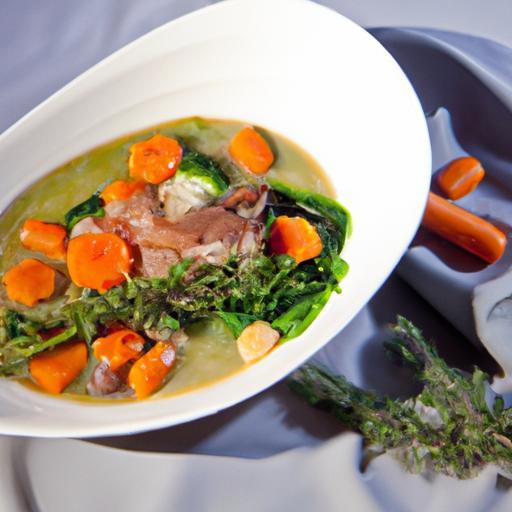
Unlocking flavor: how to craft rich broth for free begins with selecting humble ingredients that pack intense taste. Drawing on everyday kitchen staples like onion skins, carrot peels, and leftover herb stems, this approach transforms what many might discard into a deep, complex base. The magic lies in balancing aromatics and umami-rich elements to create a broth that sings with vitality and soul.
Prep and Cook Time
- Preparation: 15 minutes
- Simmering: 3 to 4 hours
- Total Time: Approximately 4 hours 15 minutes
Yield
- Approximately 8 cups (about 2 quarts) of richly flavored broth
Difficulty Level
- Easy – Beginner friendly with hands-off simmering
Ingredients
- 4 cups vegetable scraps (onion skins, carrot ends, celery leaves)
- 1 large onion, quartered (leave skin on for color)
- 2 medium carrots, roughly chopped
- 2 stalks celery, chopped
- 4 cloves garlic, smashed
- 1 bay leaf
- 1 teaspoon black peppercorns
- 2 sprigs fresh thyme or 1 teaspoon dried thyme
- 4 cups cold water (or enough to cover ingredients)
- 1 tablespoon olive oil (optional, to enhance roasted depth)
Instructions
- Gather your kitchen scraps. Use clean vegetable ends and peels that might otherwise go to waste. Avoid anything bitter or too woody like broccoli stems.
- Lightly roast aromatic vegetables. In a large stockpot, heat olive oil over medium heat. Add onion, carrots, celery, and garlic. Sauté until golden brown, about 5 minutes, stirring occasionally to prevent sticking. This step builds a caramelized foundation full of warmth.
- Add the vegetable scraps, herbs, and spices. Toss in your reserved scraps along with bay leaf, peppercorns, and thyme.
- Pour in cold water to cover. Fill the pot with cold water, about 4 cups or just enough to submerge all ingredients.
- Bring to a gentle simmer. Heat the pot over medium until it just starts bubbling, then immediately lower to the gentlest simmer. Avoid boiling; this keeps the broth clear and flavors delicate.
- Simmer low and slow for 3-4 hours. The long simmering extracts maximum flavor, body, and color. Skim any foam or impurities that rise to the surface for clarity and a clean taste.
- Strain and cool. Carefully pour the broth through a fine mesh sieve into a clean container. Discard solids. Allow to cool before refrigerating or freezing.
Tips for Success
- Use frozen scraps: Collect vegetable ends in a freezer bag over time. This makes preparation effortless and reduces waste.
- Add umami boosters: For extra depth, consider adding a dried shiitake mushroom or a splash of soy sauce during simmering.
- Avoid strong-flavored vegetables: Potatoes and cruciferous veggies like cauliflower can overpower the broth with bitterness.
- Skim frequently: Regularly removing foam ensures a crystal-clear, refined broth.
- Make ahead: Broth improves with time; refrigerate overnight before using for intensified flavor.
Serving Suggestions
This exquisite broth shines as a warm sip or acts as a luscious base for soups, risottos, and sauces. For a simple presentation, ladle into rustic bowls and garnish with fresh chopped herbs like parsley or chives for freshness and color. A drizzle of chili oil or a squeeze of lemon can add compelling contrast.
Consider pairing with crusty artisan bread or incorporating into dishes such as vegetable minestrone, noodle bowls, or grain salads for a comforting depth that elevates humble ingredients to gourmet heights.
| Nutrient | Per Cup (240ml) |
|---|---|
| Calories | 20 |
| Protein | 1.2g |
| Carbohydrates | 4g |
| Fat | 0.1g |

For more inspiration on sustainable cooking and broth ideas, visit our related article on Zero Waste Cooking Essentials. To dive deeper into the nutritional science behind broth, check out this comprehensive guide from Healthline.
Q&A
Q&A: Unlocking Flavor – How to Craft Rich Broth for Free
Q1: Why should I bother making my own broth instead of buying it?
A1: Homemade broth is like liquid gold-it’s bursting with natural flavors, completely customizable, and free from unnecessary additives. Plus, crafting your own broth saves money and turns kitchen scraps into culinary treasure, making it a sustainable and savvy choice.
Q2: What exactly goes into crafting a rich, flavorful broth “for free”?
A2: The secret lies in using scraps and leftovers that would normally be tossed-think vegetable peels, onion skins, carrot ends, mushroom stems, and even chicken bones. By saving these little gems and simmering them slowly in water, you unlock deep, layered flavors without spending a dime.
Q3: How do I start collecting scraps without ending up with a cluttered mess?
A3: Keep a designated container or bag in your freezer exclusively for broth-worthy scraps. Every time you peel, trim, or finish an ingredient, pop the extras in there. When it’s full or you feel inspired, it’s broth time! This organized system keeps your workspace clean and your ingredients fresh.
Q4: How long should I simmer my broth to get the richest flavor?
A4: Patience is a flavor’s best friend! Vegetable broths typically sing after an hour or two of gentle simmering, while bone broths benefit from 6 to 24 hours of slow cooking to extract collagen and minerals. The longer you simmer (low and slow), the deeper the flavor.
Q5: Are there any secret tricks to enhancing broth flavor without adding salt?
A5: Absolutely! Roast your scraps before boiling to caramelize natural sugars, add fresh herbs like thyme or bay leaves, include whole peppercorns for a mild kick, or toss in a splash of acid such as apple cider vinegar to help draw out minerals. These techniques build complex notes, turning simple broth into a symphony of taste.
Q6: Can I freeze broth for later use, and how long will it last?
A6: Yes! Once cooled, pour your broth into airtight containers or freezer-safe bags (leaving room for expansion), then freeze. It keeps beautifully for up to 3 months. When you need a flavor boost, thaw and enjoy your homemade elixir.
Q7: What dishes benefit most from this homemade broth?
A7: Nearly any dish that calls for stock or water! Soups, stews, risottos, sauces, grains, and braises come alive with homemade broth, adding depth and richness that store-bought just can’t match.
Unlock the magic of kitchen scraps, save money, and elevate your cooking with rich, homemade broth-your secret weapon for flavorful meals without spending a penny!
Final Thoughts
Unlocking the secret to a rich, flavorful broth without spending a dime isn’t just about saving money-it’s about embracing creativity and sustainability in your kitchen. By transforming humble scraps and forgotten ingredients into a deeply satisfying base, you invite new dimensions of taste to your cooking while honoring resourcefulness. So next time you’re about to toss those veggie peels or leftover bones, remember: these overlooked treasures hold the key to unlocking a world of flavor, proving that the best broth often starts with what you already have at hand. Happy simmering!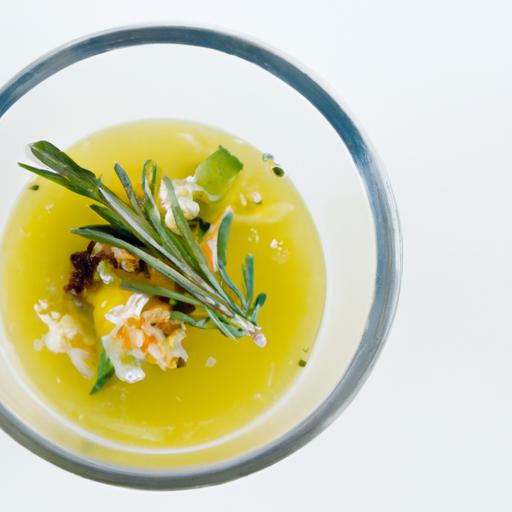


